
Free delivery on orders over £100.00*
Over 200* Hema Free Gel Polish Colours
Safe and secure checkout
Klarna & Apple Pay Accepted
 https://media.lecente.com/wp-content/uploads/2023/06/15123639/80s-theme-neon-party.jpg
 That 80’s Theme Neon Party
Lecenté
https://lecente.com/wp-content/themes/lecente-v1-1/img/logos/supersonic-playground-logo.png 300 80
Lecenté That 80’s Theme Neon Party.
By Elizabeth Barlow, Lecenté Creator.
The Perfect Neon Shades
Who doesn’t love an 80s-themed party? I know it’s my absolute favourite! The only problem? Figuring out what to do with your nails. But don’t worry, because with Lecente’s 80’s Picture Show collection, you won’t be stuck for options. This fun and vibrant collection includes six unbeatable gel polishes (check out the colour options below). Not only are they super strong in pigment, but they’re also perfect for creating simple yet stunning nails with just one coat.
So why wait? Grab your tutu and neon beads, and get ready to party like it’s the 80s!
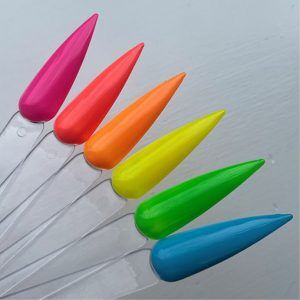
Picture from Top to Bottom: Carried A Watermelon, Phone Home, Twist And Shout, Great Scott!, Who You Gonna call?, Breakfast Club.
Unleash Your Extra Neon Nail Look
If you’re feeling bold and in the mood for extra experimentation, look no further than Lecente’s Neon powders. While the above collection is great for nail art with its high pigmentation, these powders take it to a whole new level. Any professional nail technician would be lucky to add them to their nail art kit as they are incredibly versatile. One technique that I personally adore is stamping, and I’ll walk you through how to use these powders for it step-by-step.
- Apply base and colour coat of your choice (the lighter the better, we want the neon to pop)
- Pick the stamping plate you want to use making sure that the design is not too big as you want the powder to compress into the plate.
- Using the neon powders of choice take your brush (the P1 or G1 brushes work great for this) and pat and push them into the stamping plate
- Use your scraper to remove the excess powder (Do this a few times to ensure there isn’t any loose powder remaining) then pick up the design using the stamper
- This is the fun bit…unlike polish were you have to be super quick to get it stamped on the nail, with the powder you can take your time make sure you get it exactly where you want it without any pressure before you press it on.
- Apply top coat and cure (be sure to float your top coat on to avoid disturbing the powder on your stamped design)
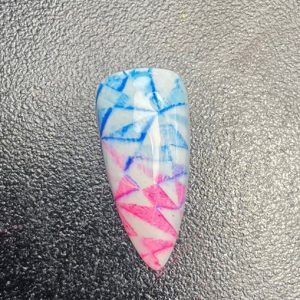
Here’s one I did earlier using Create White Magic Gel Polish, Awesome Neon Effect Pigment and Acid Washed Neon Effect Pigment Powder and a I’m Yours Stamping plate.
My TOP 3 go to Neon Powder
Big Time – a bold and vibrant purple
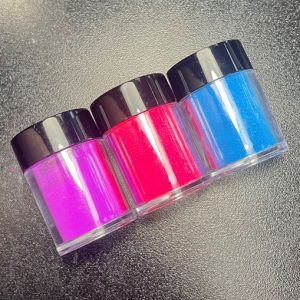
Awesome – a super neon pink
Acid Washed – an electric blue
More Neon Nail Inspiration
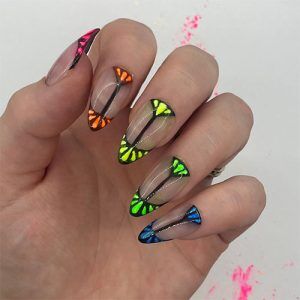
Although I initially suggested these colours for a retro 80s party, they truly have endless possibilities. From summer to festivals to pride celebrations, these vivid shades are perfect for any occasion. And if you’re still in need of inspiration, I highly recommend browsing Lecente’s YouTube channel for even more tutorials and creative ideas, including these ones I created with these neon hues.
You can use my code EMB10 at the checkout on lecente.com to enjoy a 10% discount on your order. T&C’s apply.
 https://media.lecente.com/wp-content/uploads/2025/03/11115611/PRODUCT-PICS-3-scaled-1-750x500.jpg