
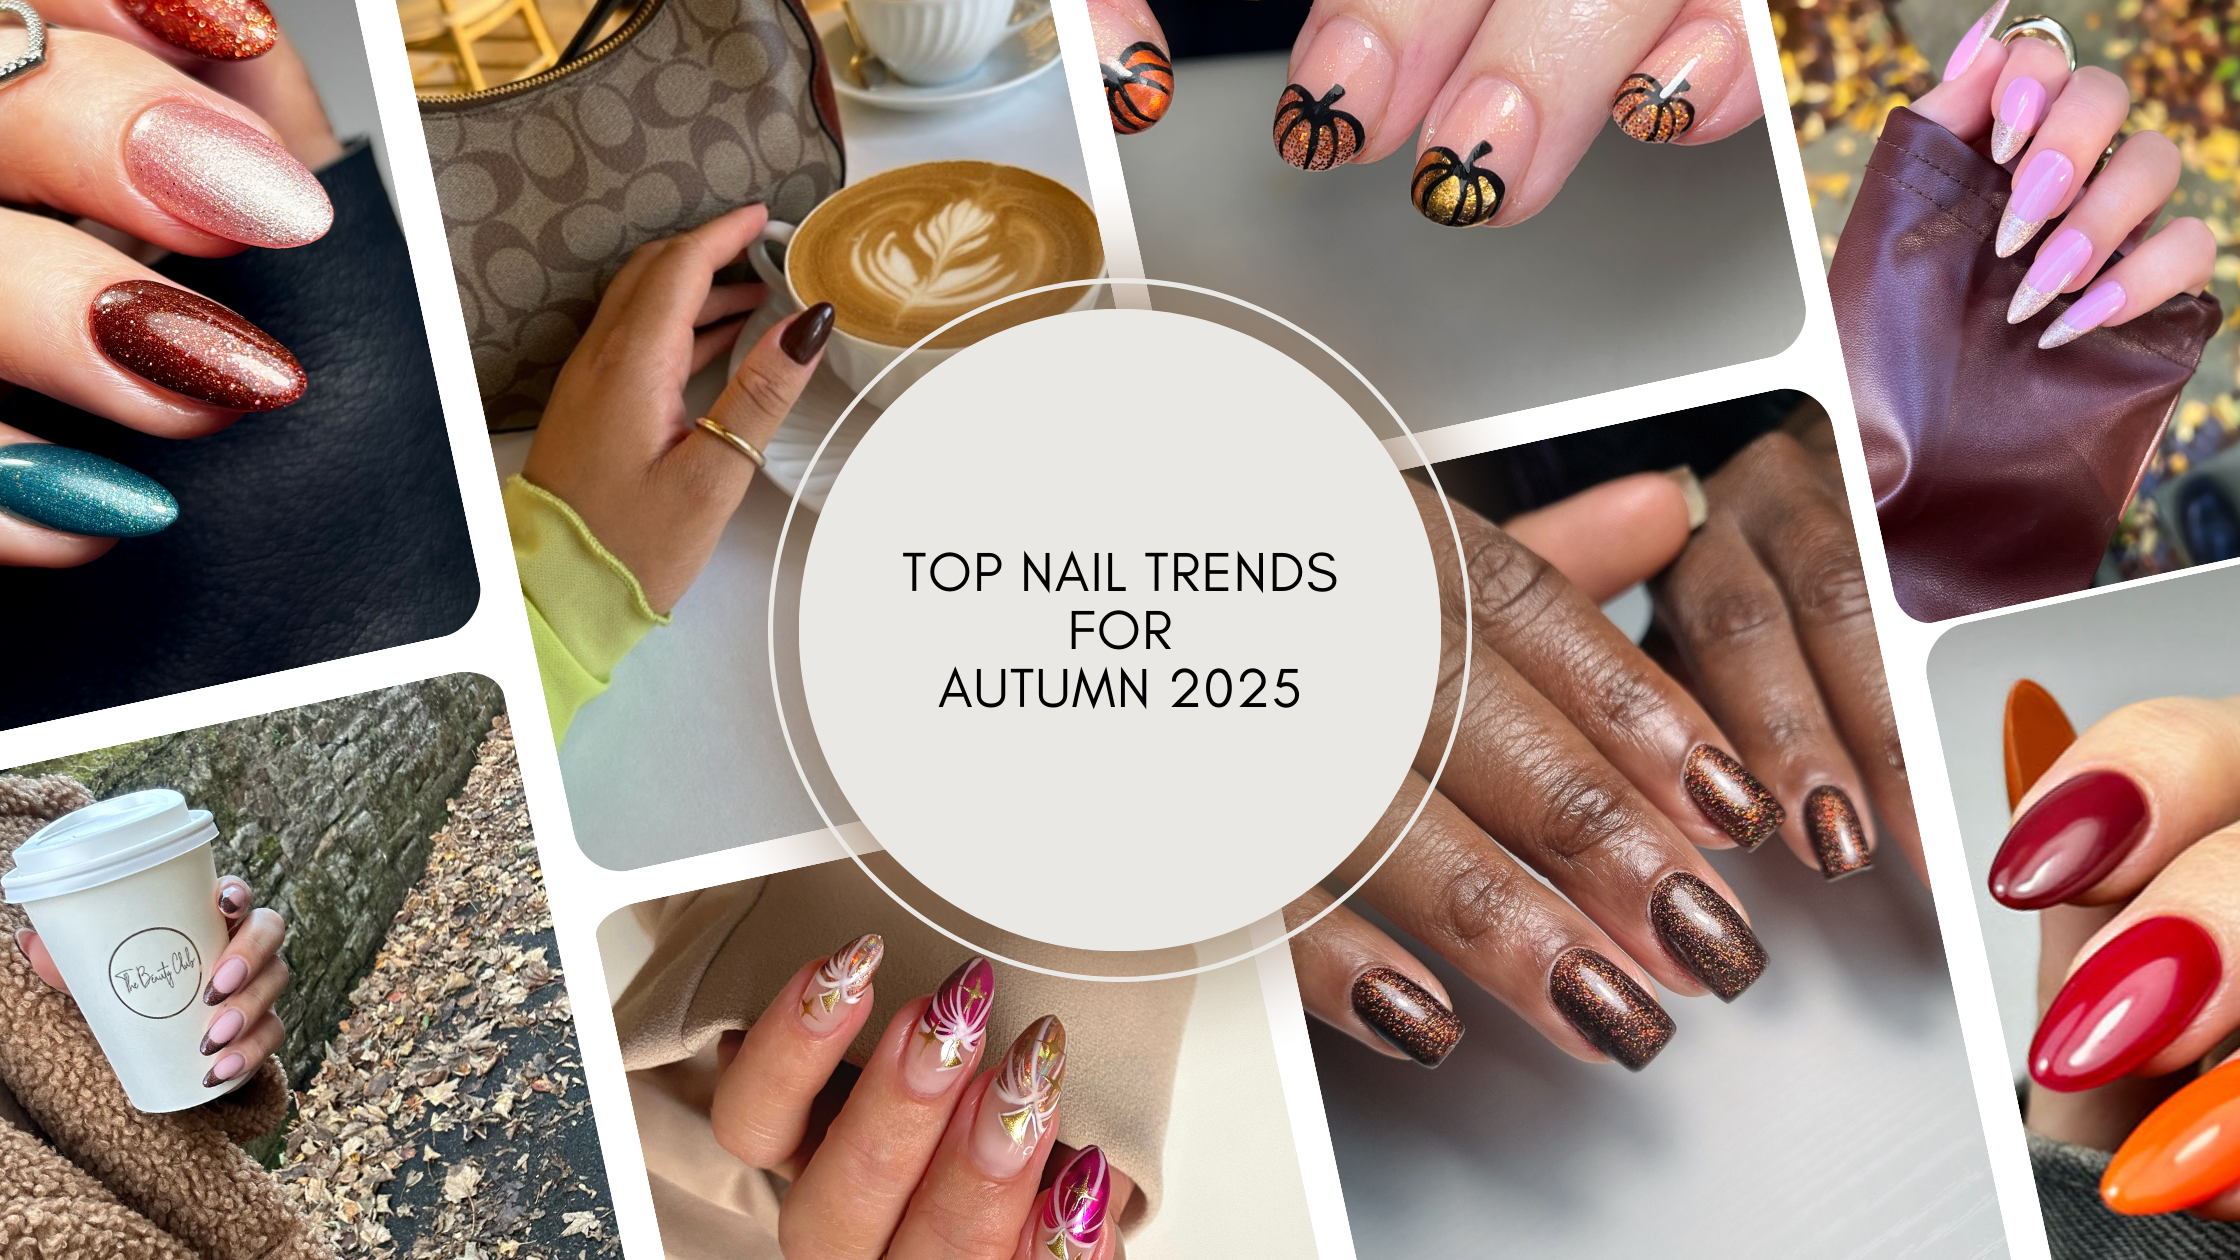
Top Nail Trends For Autumn 2025
Related Posts
How To Transition Brands - Cost Effectively!
We’ve all been there when we fall out of love with a system for one reason or another but can’t help but stare at the products and see all the hard earned £££ spent on it. It’s a vicious circle, invest in something else but lose the money on all the original investment. So how can you transition but in the most cost-effective way? Firstly, before a new investment in a new brand is made question yourself WHY are you switching? · What boxes is your system not ticking for you? Affordability, variety, ease, Brand support? · Is there anything you can do to make this system work better for you? Don’t switch so hastily if you think you are not getting the right results, reach out to the Brand for support. Switching without exploring this could mean you invest in a new system and simply take the same problem with you. · Does your system work great but just isn’t working for everyone? Remember that’s fine! Every client is different, no one brand will suit all. You could just scale back your collection and add in a secondary system to offer a larger variety for your clients, and a full transition may happen organically. So, you’ve answered the above questions, but you’ve decided you are definitely going to switch. What do you do now? 1. Do your own research. Contact your new potential Brand, ensure they tick all of your boxes. Discuss starter packages, payment options, Education and transitional support. 2. Begin to ‘excite’ your clients with chats about some new and exciting products you are going to be adding soon. No client will thank you if you suddenly pull the rug from beneath them and get rid of the products they knew and loved. Some clients hate change. But if you involve them in the process and sell the benefits of the products to them, they will transition with ease. You could even hold a ‘NEW IN’ event/offer! 3. The key word is transition. Do not suddenly stop and use something else. You know your clients, make note of go to colours that are popular and you couldn’t be without. Discuss with your new brand your starter package, ensuring some of your go to colour equivalents are in your new order. 4. Purchase some sticky dots. Use your old and new system side by side for the transition, pop a dot on shades you know you cannot be without, and when you use any other colour from your old system pop a dot on it. After 4-6 weeks the use of your old Brand will have naturally diminished, and the clients will want the new exciting system because they have been sold all the benefits and you have built the excitement. Bottles with dots on are shades customers want and love, so scan your system for similar shades without dots and sell them. These are your ‘shelf sitters’. Do this every couple of weeks and use this cash to purchase replacement shades from your new Brand while you use up what you have. 5. Keep an eye on your old Brands selling sites. Just because you don’t love them anymore doesn’t mean no one else does. Especially in this financial climate, techs need a helping hand to get a particular shade, and it just may be a shade you do not need anymore. Win Win! You never know someone may want a bundle and your total switch happens much quicker. 6. Take the Education! You invest your money, even buy the latest collection, but its just as important, if not more important, to really delve deep in knowledge of your new Brand and learn how to get the best from it. Otherwise, you will be wasting even more money looking to switch again very soon. (And remember Education is tax deductible!) 7. Look at all of your stash! Do not just focus on your gel collection. We are all guilty of buying EVERYTHING! It’s addictive, but we don’t need it. Look at what other goodies are in the back your drawers you can make sale of to contribute towards your new investment. 8. Finally, get your pricing straight! Your new Brand should be able to assist with your cost per service figures. An exciting new Brand is a perfect time to elevate your prices! No quibbles. A simple £1 increase per service, based on 5 clients a day, 4 days of the week, (4 week month) is £80pcm extra! Don’t be nervous of £1 (or more) increase, we all know everything in life has increased much greater than that! This increase could purchase an entire new release every month (or some updated education!). If you are here looking to transition or add Lecenté to your business email info@lecente.com who will assign an Educator locally you, who will assist in building a transition package to suit your needs. We may even be able to get one of our Award-Winning Educators to visit your salon or arrange for you to visit their salon for a first hand demonstration of Lecenté Create, it’s benefits and for you to try yourself (location dependent). Transition Kit - Save Over 20%
Learn moreHard Gel Vs Builder Gel
Nail Tech Tips: Choosing Between Hard Gel and Bottled Builder for Your Clients. In recent years, in the world of nails, the term ‘Builder’ has become very popular, yet it has been around for decades! Traditionally the term builder refers to what is now known as hard gel - in a pot. Still used like this today, it’s a popular service, and back on the rise! I have recently, somewhat infamously, written an article in an industry publication titled ‘Are you builder brainwashed?’, a subject I’m passionate about as a gel specialist technician. Bottled builders somewhat squeezed out their potted sister, for no reason in my opinion. It is certainly the most requested service in salon, yet it has highlighted the lack of education surrounding the differences between these gels, and I’m thrilled for the potted gels to be making ‘a comeback’! Choosing the right product for your client's nails is essential in providing a quality prescriptive nail services as a nail technician. When deciding between hard gel and bottled builder gels, it's important to consider the specific needs and preferences of your client, as well as your own. Here are some points to consider when choosing for your client’s service: Why Hard Gel is Perfect for Strong, Durable Nail Enhancements and Overlays · Weak or Brittle Nails - If your client has weak or brittle nails that need extra support and strength, hard gel is a great choice. Hard gel tends to be thicker in viscosity and provides a super strong base, making it ideal for adding extra support and protection to natural nails effortlessly. · Long Enhancements – Applying hard gel with a gel brush allows for precise application, and is easier to control when sculpting and creating desired shapes. It’s better suited to longer nail services as structure needs to be created. · Durability - If your client is looking for long-lasting nail enhancements that can withstand tough daily use, maybe they have an active profession where they are using their hands regularly, then hard gel is the way to go. Hard gel can last up to three to four weeks, making it a durable option for clients who need an impact resistant product. · Versatility: Hard gel is a versatile product that can be used for a variety of nail enhancements, including nail extensions, overlays, and sculpted nails. It can be easily shaped and filed to create the desired nail shape and length, making it perfect for creating custom nail designs. Used exactly like its bottled sibling it’s simple, some nail professionals enjoy using a gel brush VS the generic brush found in a bottle. · Designs – You can mix colours and add glitters and pigments to Hard Gels for a customised look. Encapsulation is a great technique to produce show stopping designs for your customers. · Professional Finish - Using a gel brush to apply hard gel can result in a more controllable application resulting in a smooth, even finish which also means less filing. Bottled Builders: Quick, Convenient, and Portable · Natural Nail Overlays – Bottled builders are great for clients looking for a simple overlay on their natural nail for added strength and durability. It tends to be thinner and more flexible than a hard gel (although every brand’s formulation differs), making it perfect for a more natural look. · Quick Application – Some nail professionals will find that a bottled builder is quicker to apply, making it a great choice for a faster nail service. Bottled builders come with a brush applicator like its gel polish sibling, making it easy to apply directly onto the nails without the need for a separate gel brush. · Portability – Bottled builders are compact and therefore easy to transport, making it convenient for mobile nail technicians or traveling professionals. Due to a huge variety of shades now available transporting a wider range in bottles is far more convenient. · Removal – Due to the thinner viscosity of these gels, soaking to remove becomes an option. Soaking of these gels will take longer than a gel polish removal due to the strengthening properties, so careful consideration should be made when selecting to either soak off or infill on each service for what is effectively a semi permanent coating. By considering factors such as nail strength, desired longevity, versatility, maintenance, and investment you can determine the best product to use for each client to achieve beautiful and long-lasting nail coatings. It is good to be able to offer a prescriptive service to your clients and have a variety of different systems for them to choose between. In conclusion, the choice between hard gel and bottled gel ultimately depends on the specific needs and preferences of your client. Remember just because they asked for builder because their neighbour has it, does not mean it suits their nail type and needs. Don’t overlook a classic gel polish service either, harder does not always mean stronger – you cannot build a house on mud. Flexibility is essential in some cases. Theresa Foddering @thenaildresser Visit our YouTube Channel or Instagram to see our Builder & Hard Gels in action, you will find lots of helpful tutorials and ideas! https://www.youtube.com/@LoveLecente https://www.instagram.com/lovelecente/
Learn more


